Getting Started with MetisTrades: From Empty Account to Tracked Portfolio
A walkthrough of the four setup steps in MetisTrades: getting your transactions in, checking how they were grouped into positions, correcting classifications and roll chains, and confirming the result looks like your account.
What you are setting up and why
MetisTrades is an options-trading portfolio tracker. You bring the trades — by uploading a broker export or by connecting a brokerage — and the app rebuilds them into positions, follows what happened to each one, and shows you what it earned or cost.
That sentence contains the whole reason setup matters. Everything the app shows is derived from the transactions in your account. If a broker row is missing, or if two unrelated trades get combined into one position, every number downstream of that — premium collected, realized and unrealized profit and loss, cost basis after assignment, wheel cycle returns, tax lots — is built on the wrong foundation. The fix is always in the data, not the display.
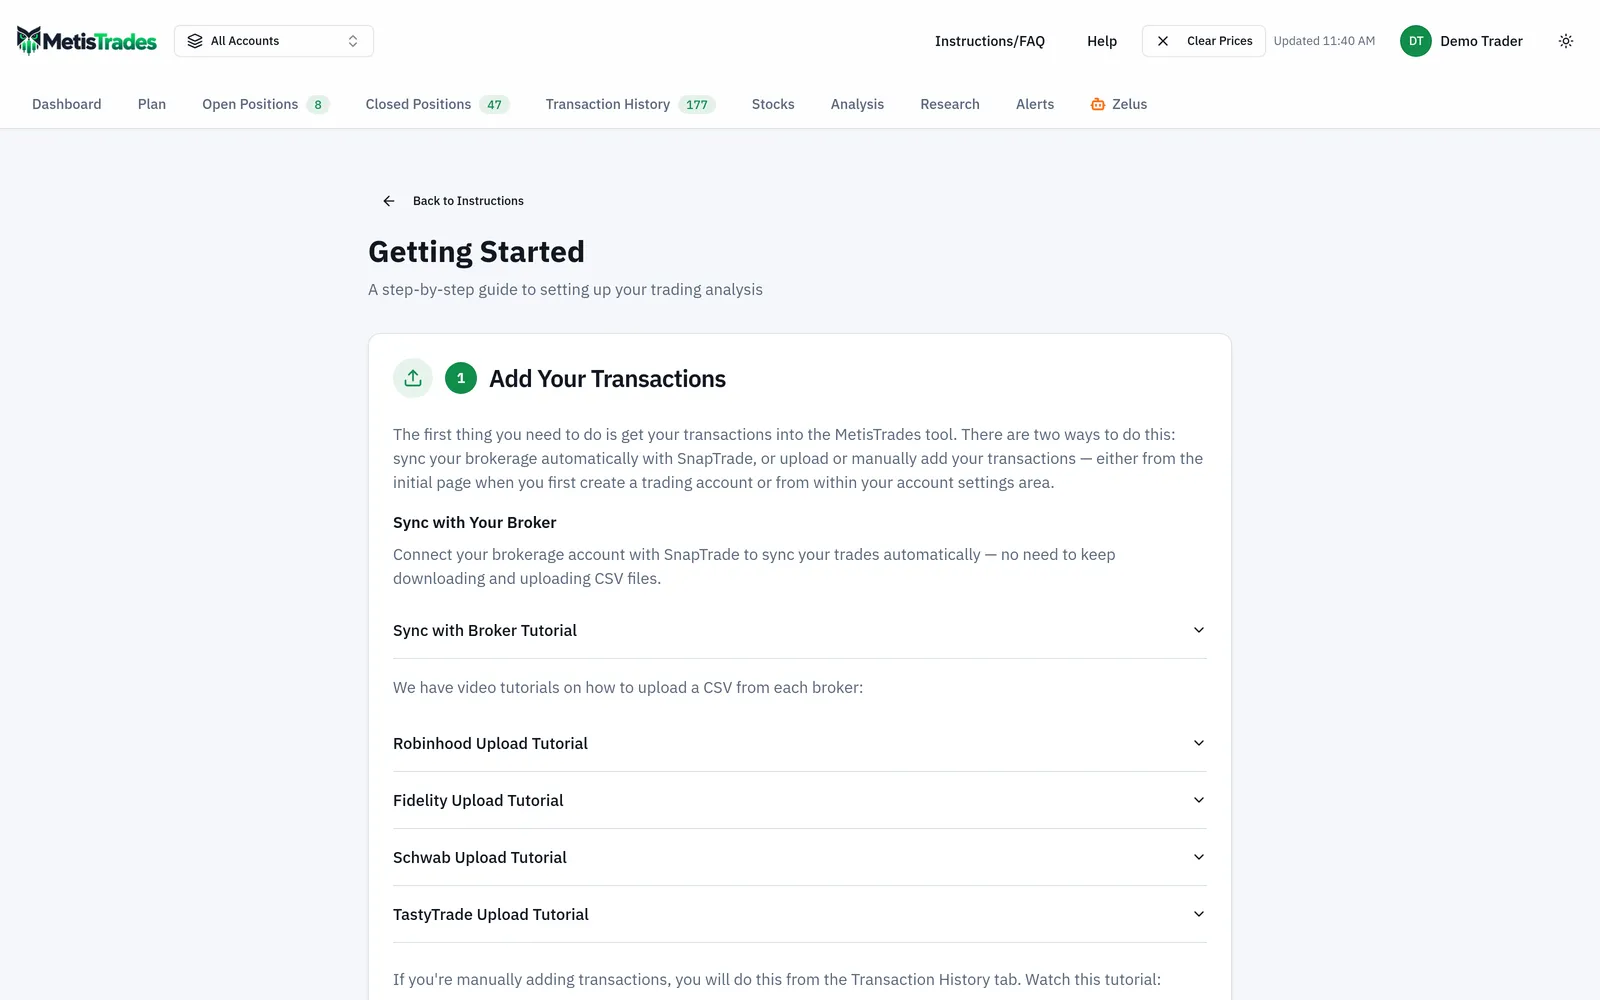
Setup is a four-step sequence, and MetisTrades has a page that walks it: Getting Started. The four steps are Add Your Transactions, Validate Your Positions, Validate Your Roll Chains, and Enjoy the Tool!. The middle two are the ones people skip, and they are the ones that decide whether the rest of the app tells you anything useful.
One expectation to set before you start: market prices in MetisTrades are delayed, so figures marked against the market will not tie out to your broker exactly. The app also cannot place, modify or close trades at your broker — closing a position here only updates your records.
Before you start
- A broker export, or broker login for a connection. The Getting Started page includes expandable broker tutorials for Robinhood Upload Tutorial, Fidelity Upload Tutorial, Schwab Upload Tutorial and TastyTrade Upload Tutorial. Connecting a brokerage instead means activity syncs on its own, though a few transaction types still need a manual entry.
- A decision about accounts. A trading account is one broker account. You can have several and view them one at a time or combined in All Accounts mode. Decide now whether a given export belongs in its own trading account, because uploads are made into a selected account.
- A decision about signing up. You can upload a file anonymously and the full tab bar appears, but that data lives in your browser session only — it is not saved to an account, and clearing it or leaving is enough to lose it. Signing in with an active subscription adds saved data across devices, multiple trading accounts, notes and tags, the Plan tab, alerts, sharing, brokerage sync, and Zelus.
- A list of the shares you hold. MetisTrades takes stock holdings into account for covered calls and when options are assigned or exercised, so missing shares distort more than the Stocks tab.
- Your brokerage records to hand. You will be comparing what the app rebuilt against what your broker actually reported.
Step by step
1. Open the Getting Started guide
Go to Instructions/FAQ → Getting Started Guide (route /getting-started). Anonymous visitors can open it without an account. Back to Instructions returns you to the Instructions page. The screenshot below shows the four steps laid out in order; note that each one has an expandable video tutorial beneath it, hosted on YouTube.
2. Add your transactions
Start by uploading transactions or adding them manually. You can upload a broker export on the Dashboard, when you first create a trading account, or from the account settings area. If you are connecting a brokerage instead, activity syncs automatically after the connection is made.
For a trade your broker file does not contain, use the Transaction History tab and add it yourself; the Manual Transaction Tutorial on the Getting Started page demonstrates the process. You can also manually close an imported transaction or one you created yourself — see Manually Closing Positions Tutorial.
3. Update your stock positions
Make sure your stock positions are represented accurately. You can manage them from Transaction History, adding them the same way you add a manual option position. The Getting Started page also points to the Stock Holding report under Analysis and includes a Stock Positions Tutorial.
Do this before you review classifications. A short call with no shares behind it in the app cannot be recognised as covered.
4. Review grouping, ungrouping and splitting
The Getting Started page calls this the most critical step, and it is worth treating it that way. MetisTrades auto-groups imported transactions into positions, but the grouping can be wrong: imported CSV files do not include a timestamp in every case, so transactions that do not belong together can appear in one position.
Review the resulting positions rather than assuming every automatic grouping is correct. Open the Open Positions and Closed Positions tables and read the strategy names. If a position is showing as a Diagonal Spread, Strangle, Straddle or anything else you did not trade, scroll right in the table until you find the chain-breaking icon with the tooltip Split this multi-leg position into separate legs, and select it to separate the position into individual legs and restore the classification for each leg. The Grouping Tutorial covers grouping, ungrouping and splitting in full.
5. Reclassify covered calls
A covered call can appear as Short Call when its underlying shares were not imported. The same can happen with a Poor Man's Covered Call, where a long LEAP provides collateral instead of shares. In either case the displayed collateral calculation may be wrong. To correct it:
- Open the Open Positions or Closed Positions table.
- Select Reclassify at the top of the table.
- Review the positions classified as Short Call.
- Select the positions that are actually covered.
- Select Convert to Covered Call.
The same menu lets you revert a position to Short Call later.
6. Validate your roll chains
A roll chain follows a position as you move it from one expiration or strike to another. MetisTrades tries to identify rolls by comparing transaction details such as symbols, quantities, strikes, transaction types and available timing information. The automatic result can be wrong when transactions are spread out over time, when closing and opening trades were placed as separate orders, or when trades were bundled into a multi-leg order in an unexpected way.
Use Modify Roll Chain to add or remove segments and reorganize the chain. Correcting the chain gives you a more accurate cumulative profit-and-loss view across the roll history. The Roll Chain Tutorial walks through it.
7. Set up the day-to-day view
The fourth step of the guide introduces features that are easy to overlook. Two are worth doing while you are still in setup mode:
- Customize columns, above the Open Positions or Closed Positions table, chooses what each table shows. The guide gives examples including DTE, Quantity, Strikes, % Return and Greeks.
- Position alerts can watch metrics such as Delta, Extrinsic Value, % Return and Days to Expiration. Expand Position Alerts Tutorial for the setup process.
Check it worked
Work back through the same tabs you used during setup, this time reading them against your brokerage records.
- Transaction History is where you see what exactly your broker reported. Look for trades you know you made that are not there — a missing opening trade is the most common cause of odd grouping and wrong cost basis downstream.
- Open Positions should read like the positions you actually have on, with strategy names you recognise. Covered calls you reclassified should now be labelled accordingly.
- Closed Positions should show finished trades, with rolled positions reading as one running result rather than a pile of unrelated entries.
Then open the Dashboard, the tab that answers "How am I doing overall?". Like everything else in the app, what it shows is rebuilt from the transactions you brought in.
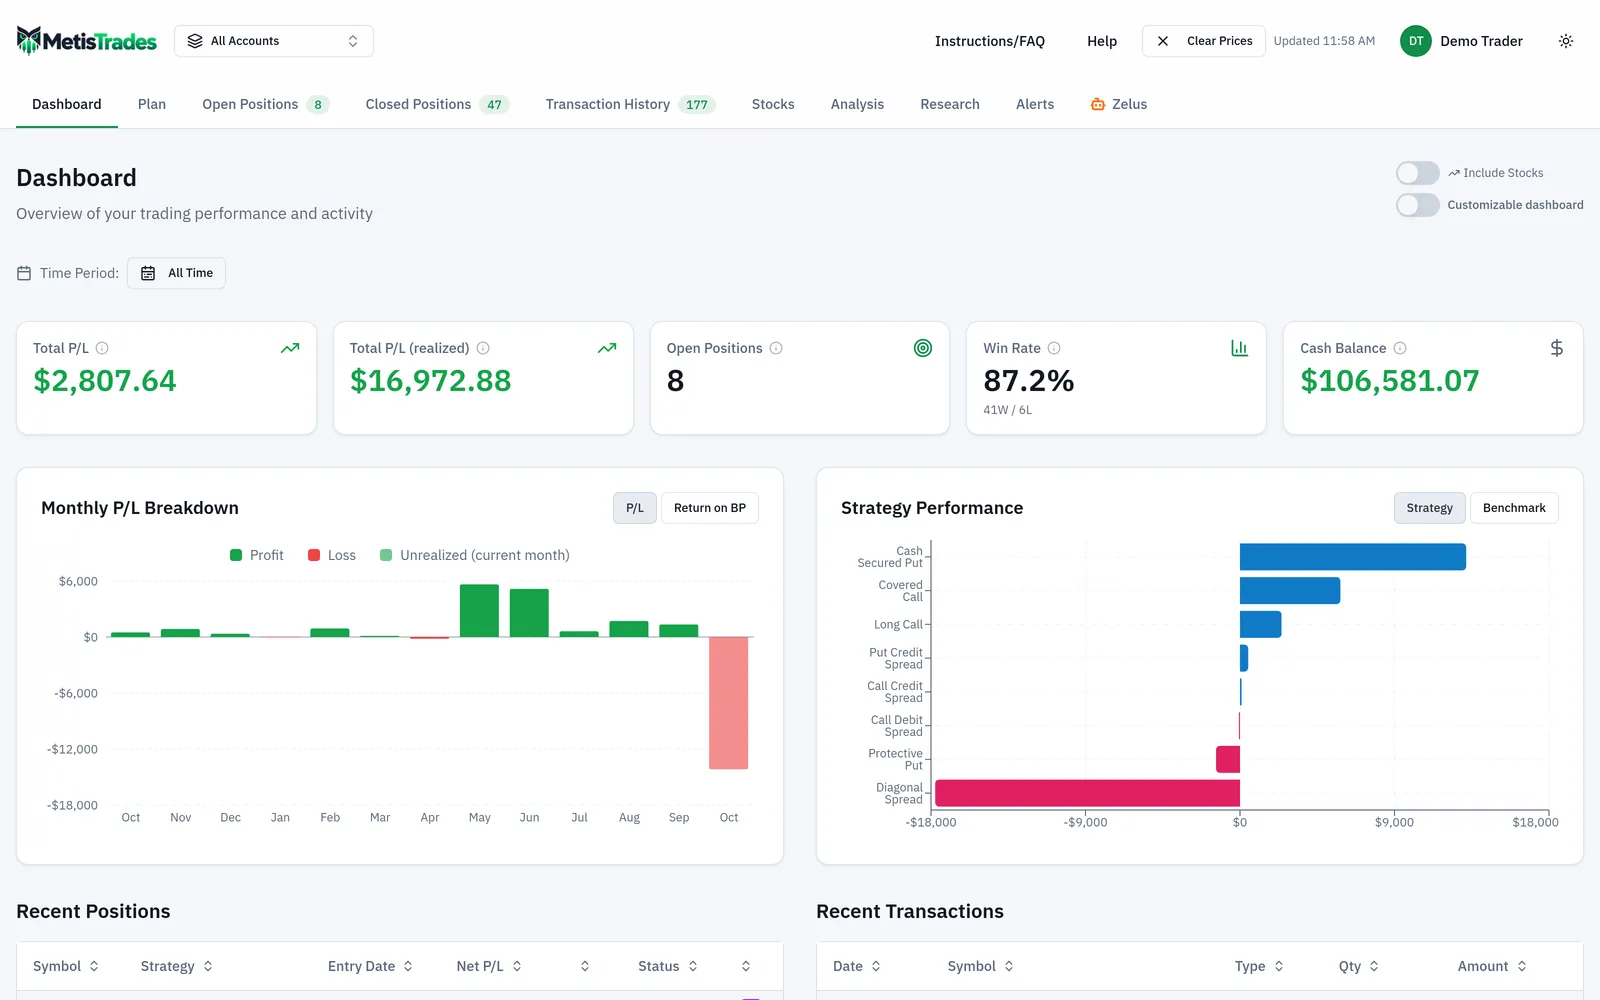
The first sign that something went wrong is usually a strategy name you never traded — a Strangle or Diagonal Spread appearing from two unrelated legs — or a covered call still sitting under Short Call. Both point back to step 4 and step 5 rather than to a problem with the display. A cumulative profit-and-loss figure across a roll history that looks nothing like what you remember points back to step 6.
Automatic grouping and roll-chain detection are starting points. You are responsible for checking that the imported trades, position legs, stock holdings, classifications and roll segments match your brokerage activity, and anything calculated from imported transactions is an estimate.
Troubleshooting and common questions
Why must I validate positions after an import?
Imported files can lack the timing detail needed to distinguish unrelated trades, which can lead the automatic grouping process to combine transactions that should remain separate.
My short calls should be covered calls
At the top right of the Open Positions or Closed Positions table, select Reclassify, choose the Short Call positions you want to change, then select Convert to Covered Call. You can undo the change later with Revert.
How do I upload more transactions later?
Go to Account Settings and find Trading Account Data. Choose the correct trading account in the dropdown, then select Upload New File. In that flow the system detects and removes transactions that were uploaded previously, so the file may include earlier transactions.
Can I turn off automatic roll detection?
Yes, under Account Settings. You can still create roll chains manually so the site can calculate P/L and other statistics for them.
Why is my Live P/L so different from Standard P/L?
Standard P/L uses only credits received and debits paid — the amount resulting from transactions already made. Live P/L adds the latest available market value of open positions and estimates what the profit or loss would be if those positions were closed at those prices. Sell a put for a $1.00 credit and Standard P/L shows +$100; if its latest available price is $0.50, Live P/L shows +$50, the $100 credit less the estimated $50 cost to buy it back.
What does Refresh Prices do?
Refresh Prices fetches the latest available market prices for open option positions. Prices are fetched during market hours and can be delayed by up to about 15 minutes; when the market is closed, the last available prices are displayed. Treat them as reference values, not as an executable quote.
I signed in and the app sent me to Account Settings
A signed-in user without active access is returned to Account Settings, with Instructions the only other reachable destination — so Getting Started cannot be opened until access is active. Your data is not deleted while a subscription is lapsed, and subscribing restores everything.
Can I try the setup without signing up?
Yes. Upload a broker file anonymously and the whole app opens up on that session's data, and the Position Analyzer needs no account at all. Nothing is saved until you create an account, and anonymous data is lost when the browser session is cleared.
Will the videos play inside MetisTrades?
The tutorial cards use Watch on YouTube and open in a new tab, so playback depends on YouTube being available in your browser and network. The videos explain the workflow, but the data in your account still needs to be checked against your brokerage records.
Related guides and help pages
Related guides
- Plan, Track, Optimize: a complete tour of MetisTrades
- Getting Your Trades In: File Imports and Brokerage Sync
- Creating an account and signing in to MetisTrades
- What You Can Use Without Signing Up, and What Pro Adds
- A Tour of Account Settings in MetisTrades
- Setting Up Trading Accounts: One Container per Broker Portfolio